ExplodeView User Manual
Every tool, tab and setting in the current build — rendering, materials and the AI tools included. Screenshots below are the real app.
1. Getting Started
ExplodeView runs entirely in your browser — nothing to install to try it. Open the app and you land on the welcome screen, which is the front door to everything else.
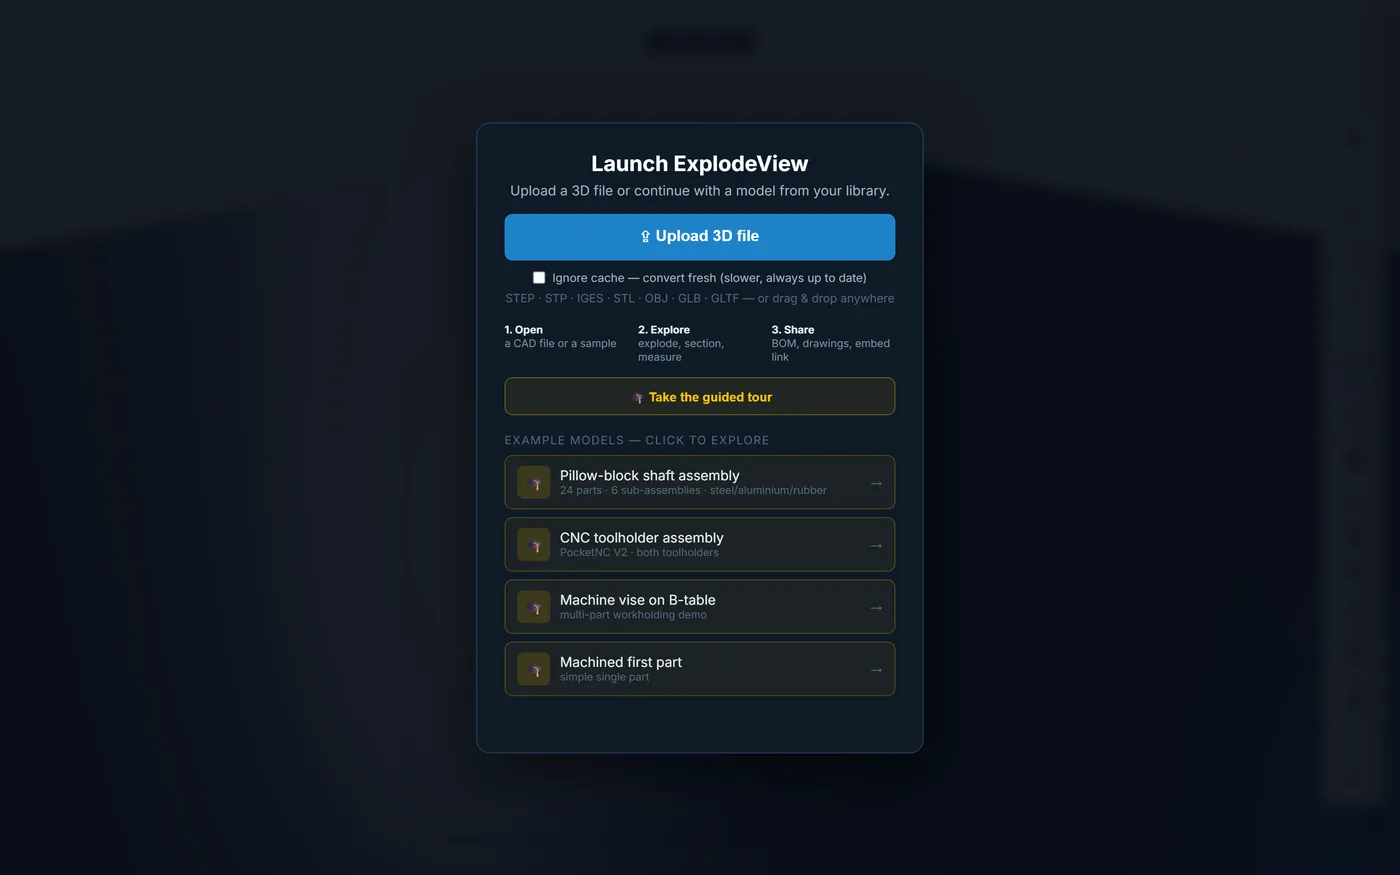
From here you can:
Trial vs. license
The first time you open ExplodeView from explodeview.com (not localhost), you'll meet the trial gate before the welcome screen above — see §10 Trial Rules for exactly how that works. A license key or the desktop app skip it entirely.
Browser requirements
| Requirement | Minimum |
|---|---|
| Browser | A current Chrome, Edge, Firefox or Safari with WebGL2 |
| GPU | Any GPU with WebGL2 support (integrated is fine for typical assemblies) |
| RAM | 4 GB, 8 GB+ for large assemblies |
2. Importing Your Files
Click Upload 3D file on the welcome screen, or drag a file anywhere onto the page at any time.
| Format | Notes |
|---|---|
| STEP / STP | Converted to geometry in-browser (or via a converter — see below). The most common CAD export format. |
| IGES | Same pipeline as STEP. |
| GLB / GLTF | Loads directly — this is also ExplodeView's own cache format, so re-opening a file you've already converted is instant. |
| STL, OBJ | Mesh formats — no assembly tree/sub-part structure, but everything else (explode, measure, section, hotspots, export) still works. |
The desktop app removes that limit: it drives a local, Docker-based converter (explodeview-converter, port 8787) that handles 100 MB+ assemblies. Start Docker Desktop, then docker start explodeview-converter, and re-import.
3. The Toolbar
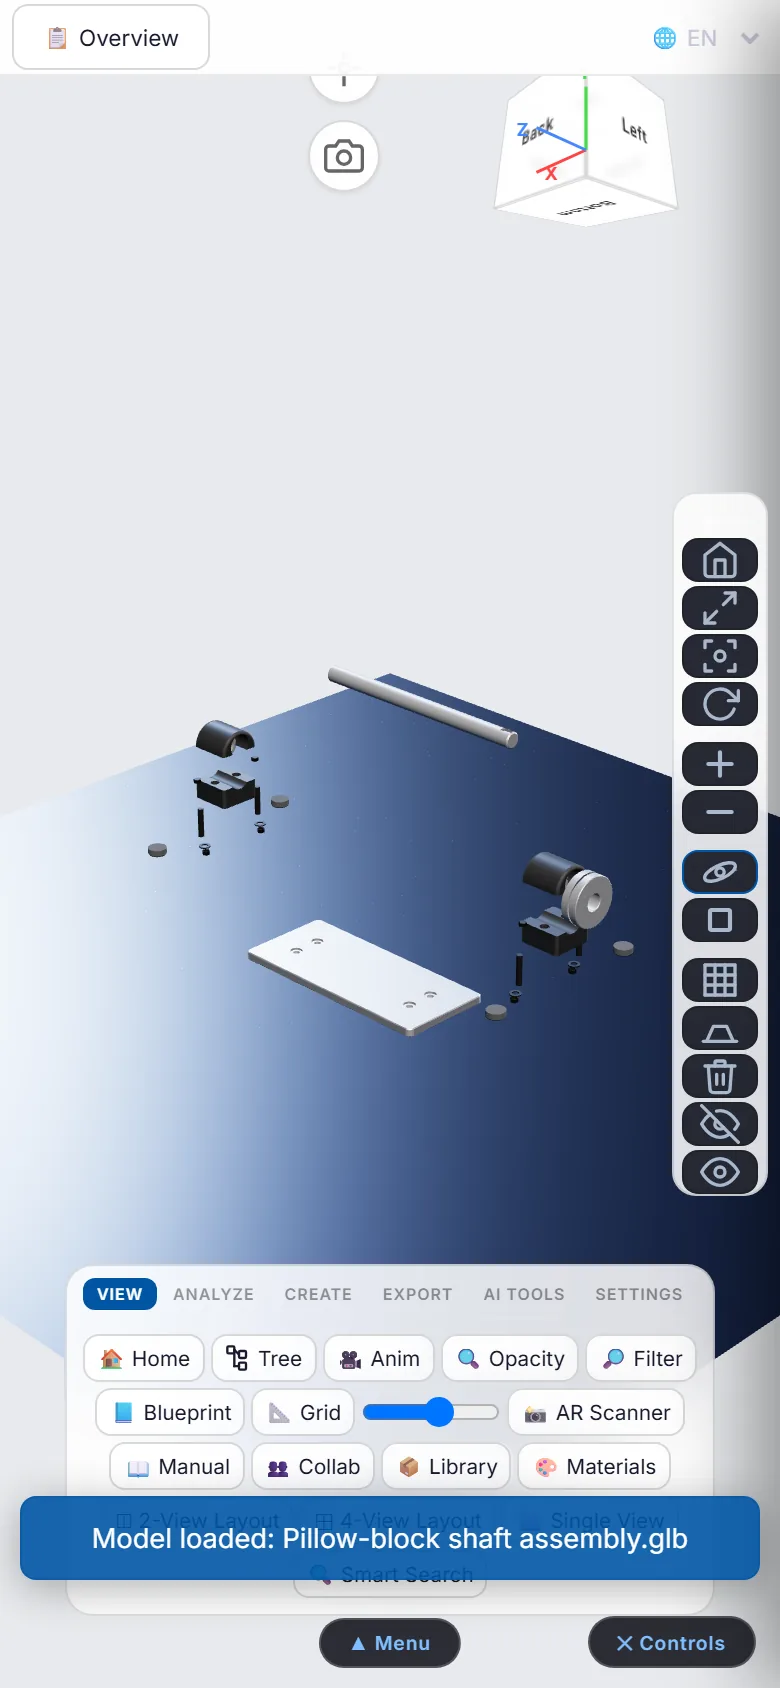
Everything lives under six tabs at the top of the screen. Click ▲ Hide Top Bar any time to tuck it away and work with an uncluttered viewport; the button becomes ▼ Show Top Bar to bring it back (this also closes any open panel).
3.1 View
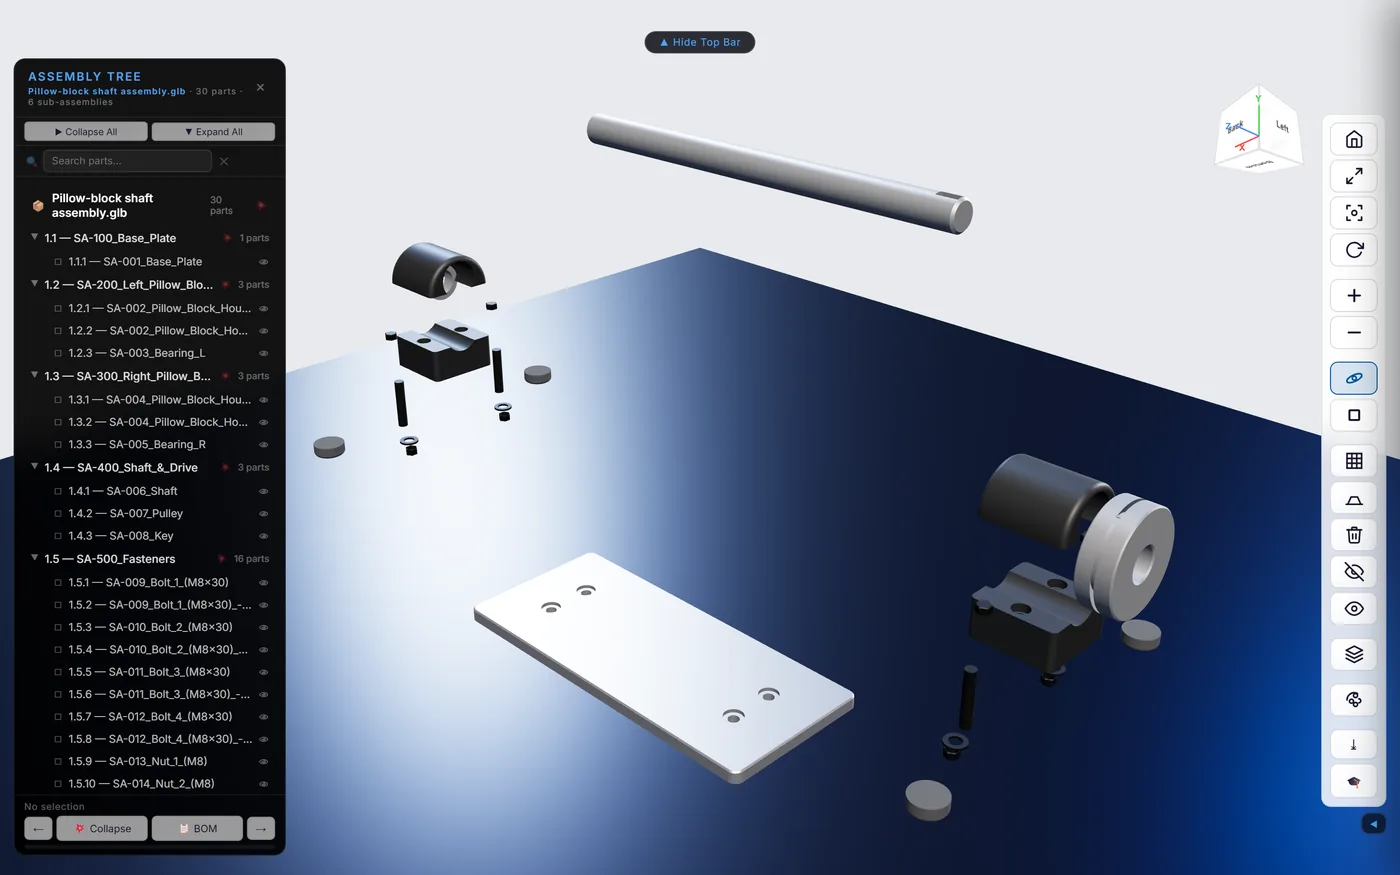
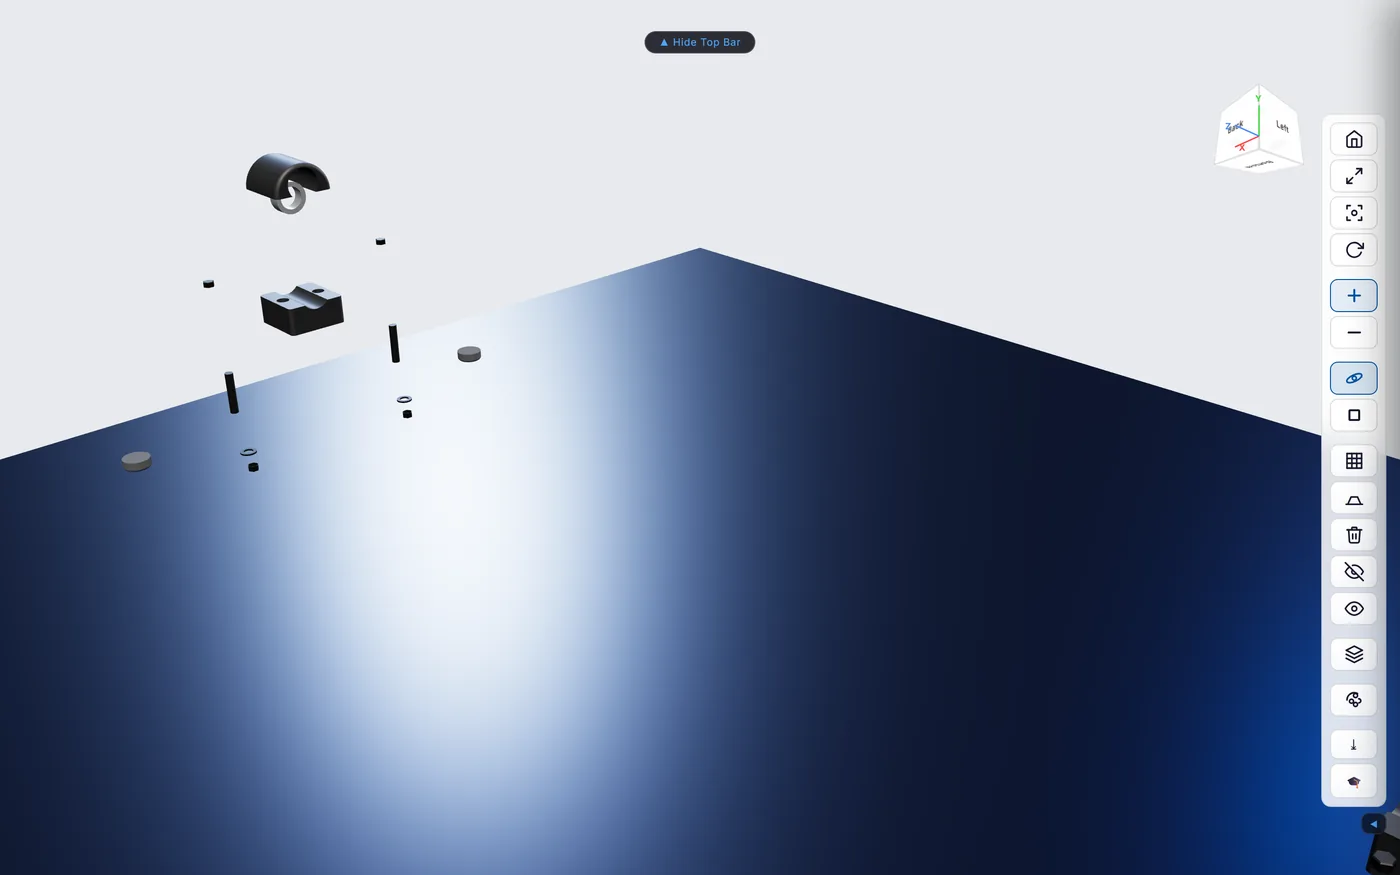
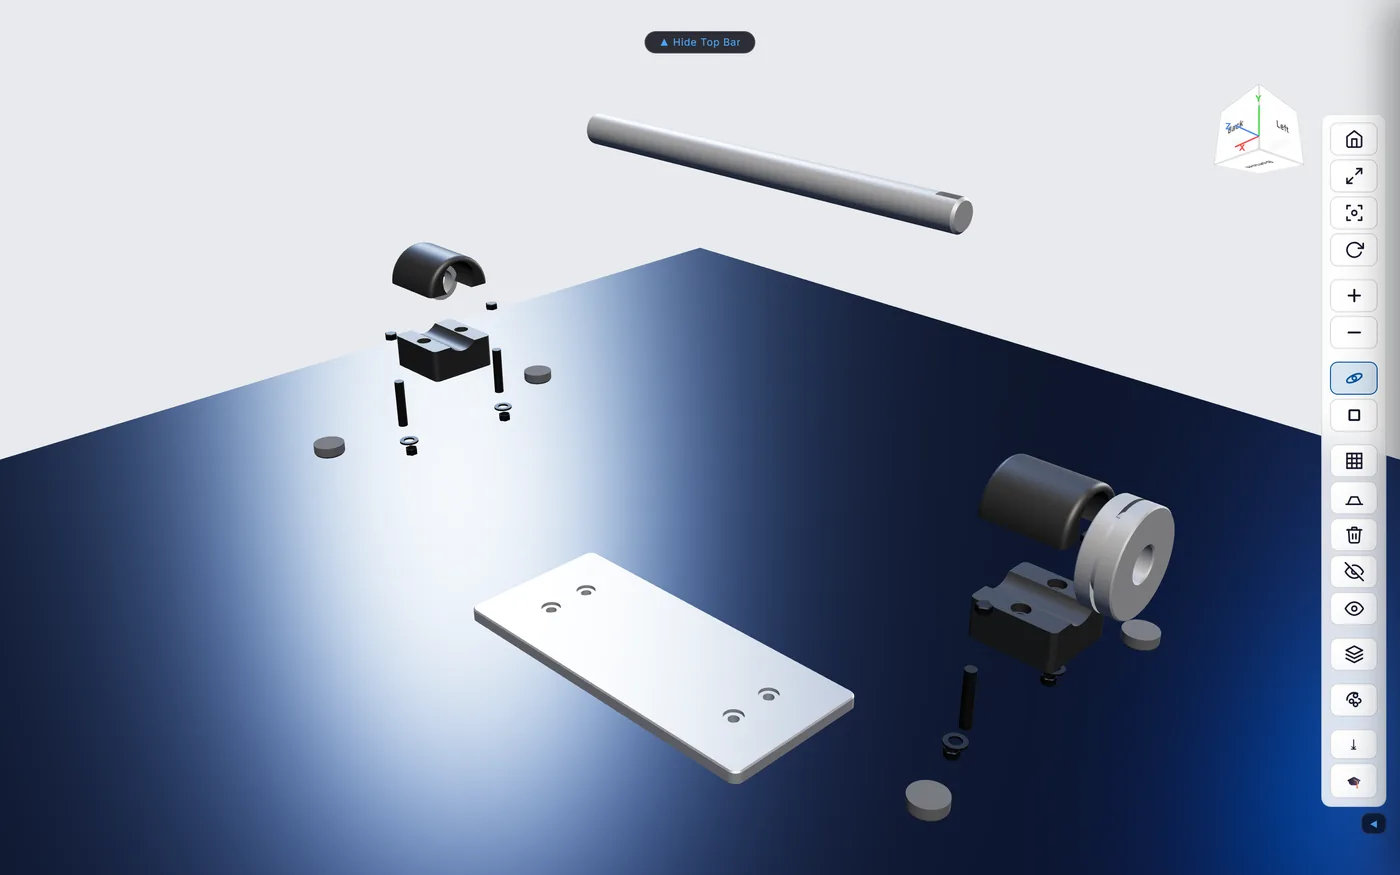
The right-hand rail (always visible) duplicates the essentials: Home, Fit to Frame, focus-on-selection, reset rotation, + / − to explode or collapse the assembly step by step, auto-rotate, grid, wireframe, drop-to-floor and more.
3.2 Analyze
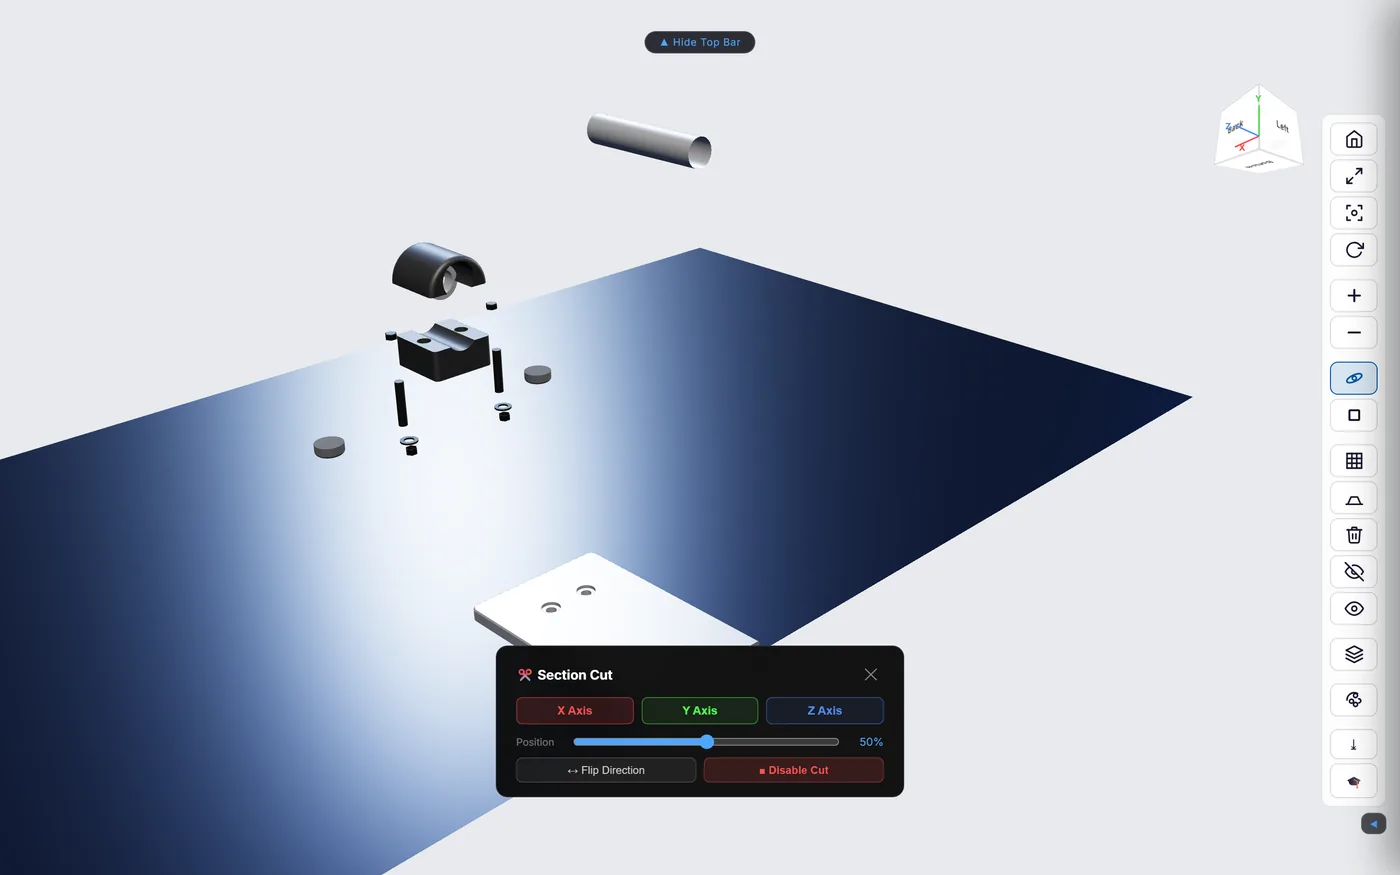
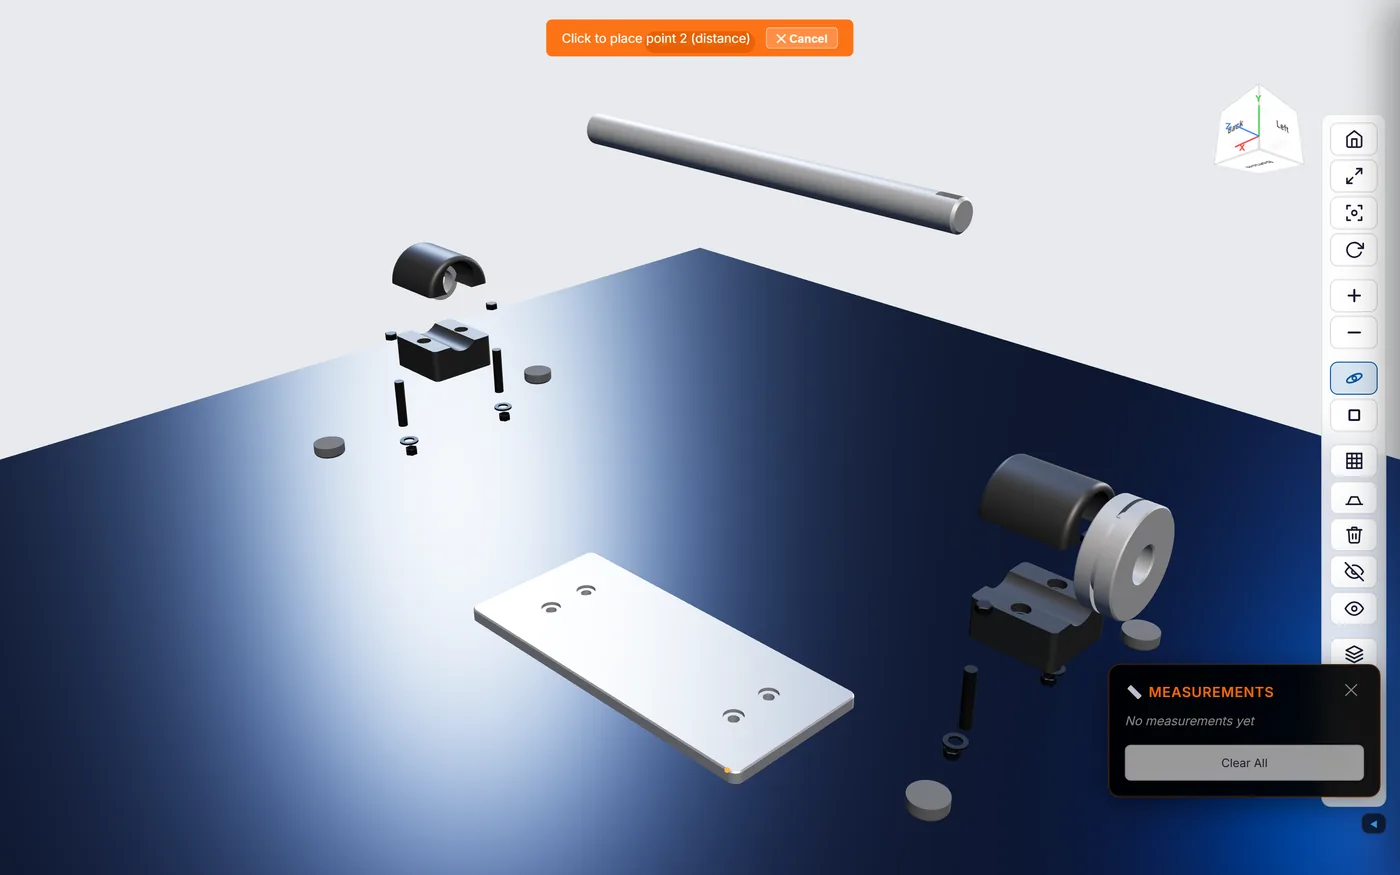
3.3 Create
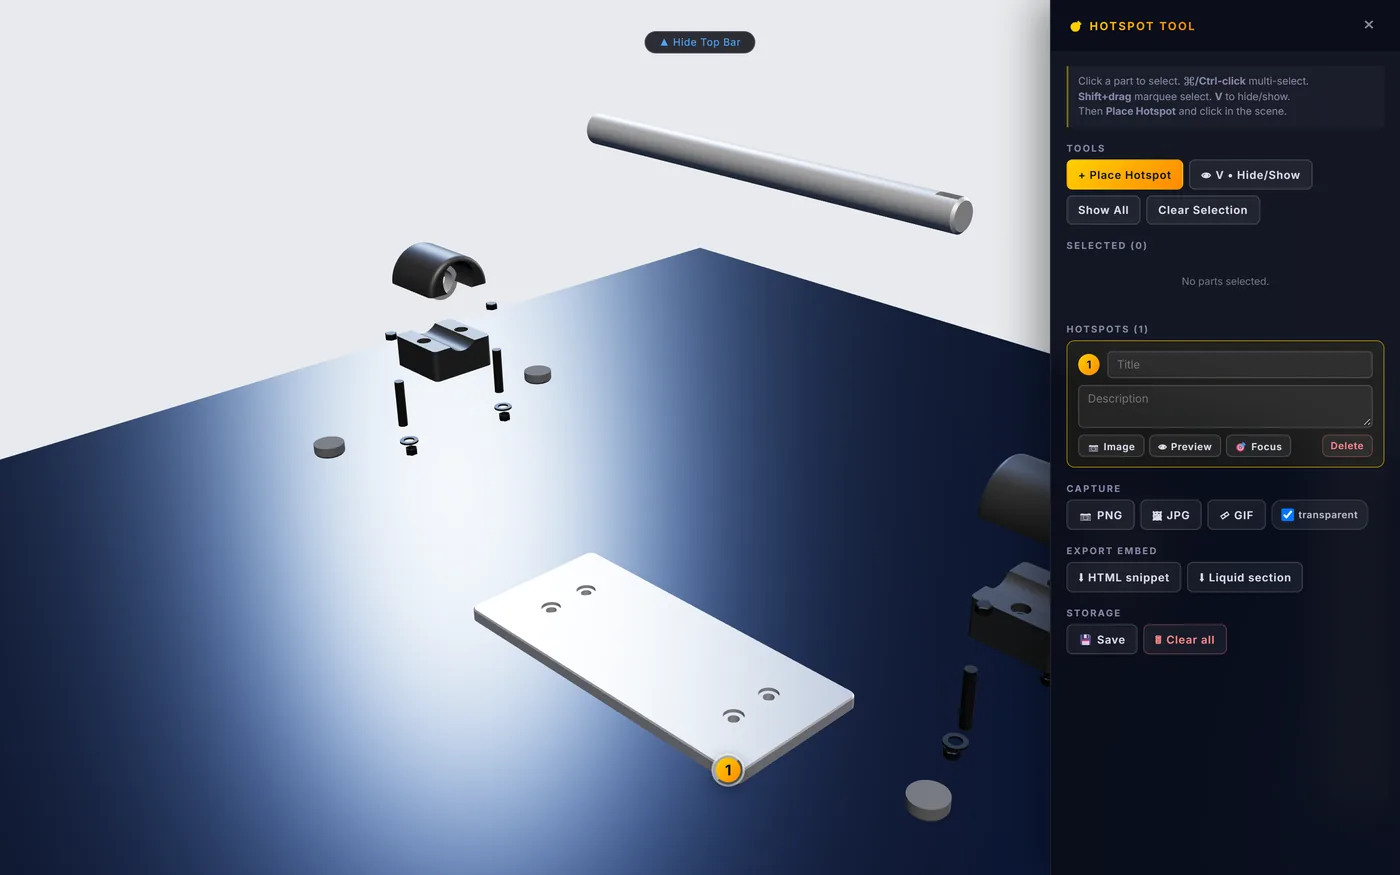
Each hotspot gets Title, Description and Image fields, a Preview and Focus button, and a Delete. Capture the current view as PNG/JPG/GIF (with an optional transparent background), then export the whole set as an HTML snippet or a Liquid section — drop either straight into a product page. Save persists hotspots to the browser for this model; Clear all removes them.
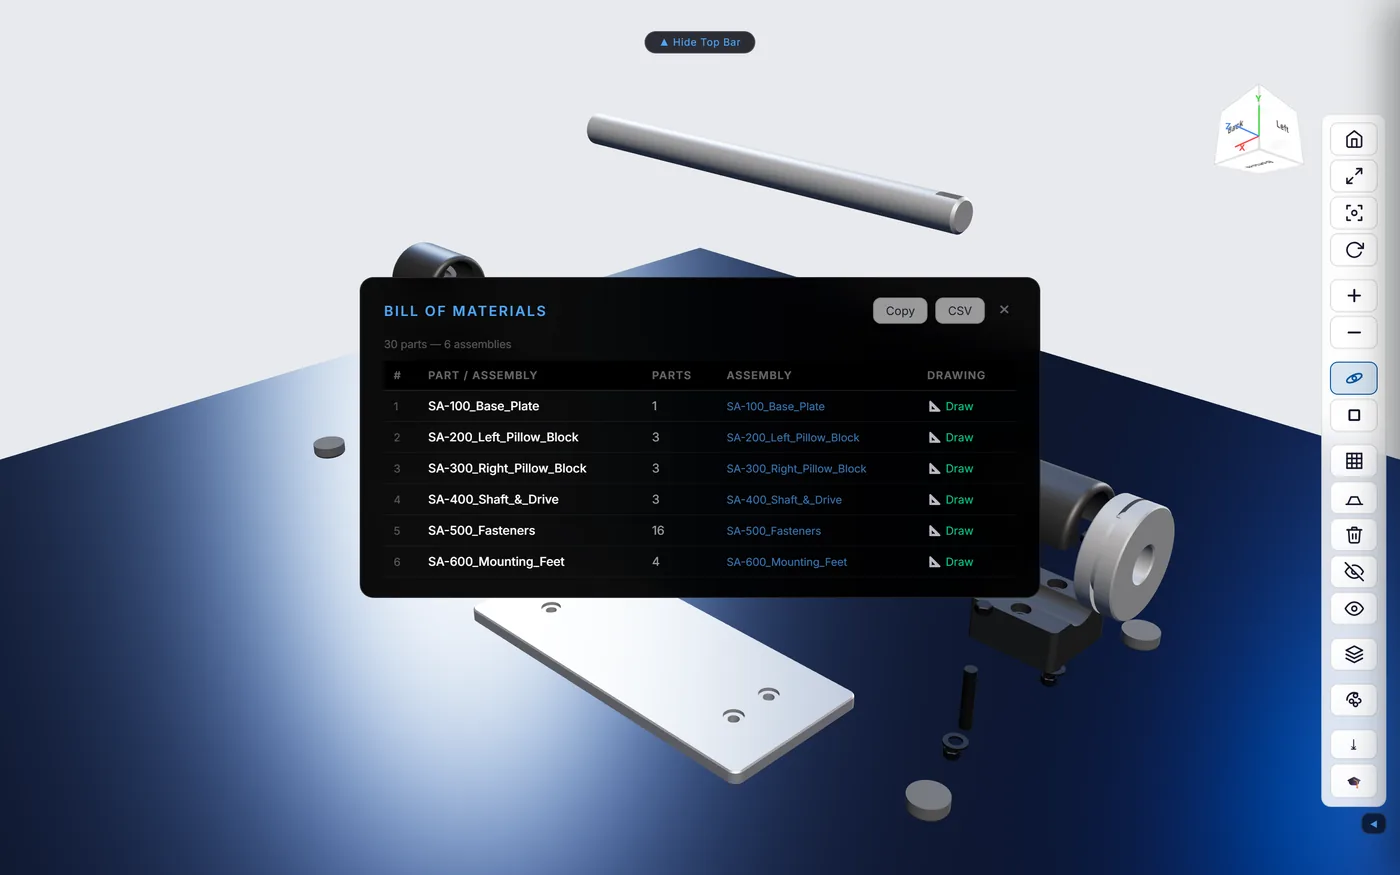
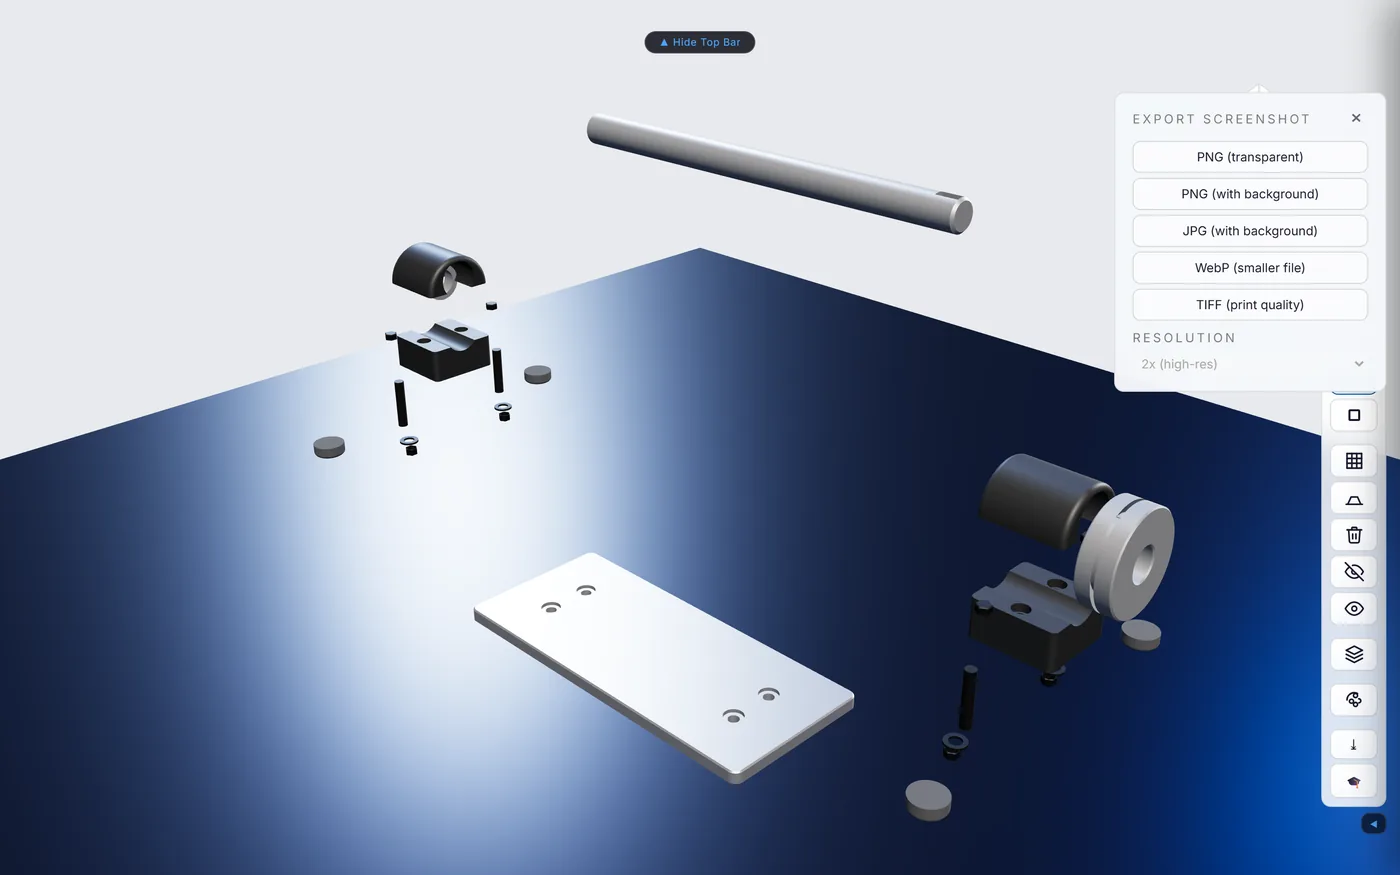
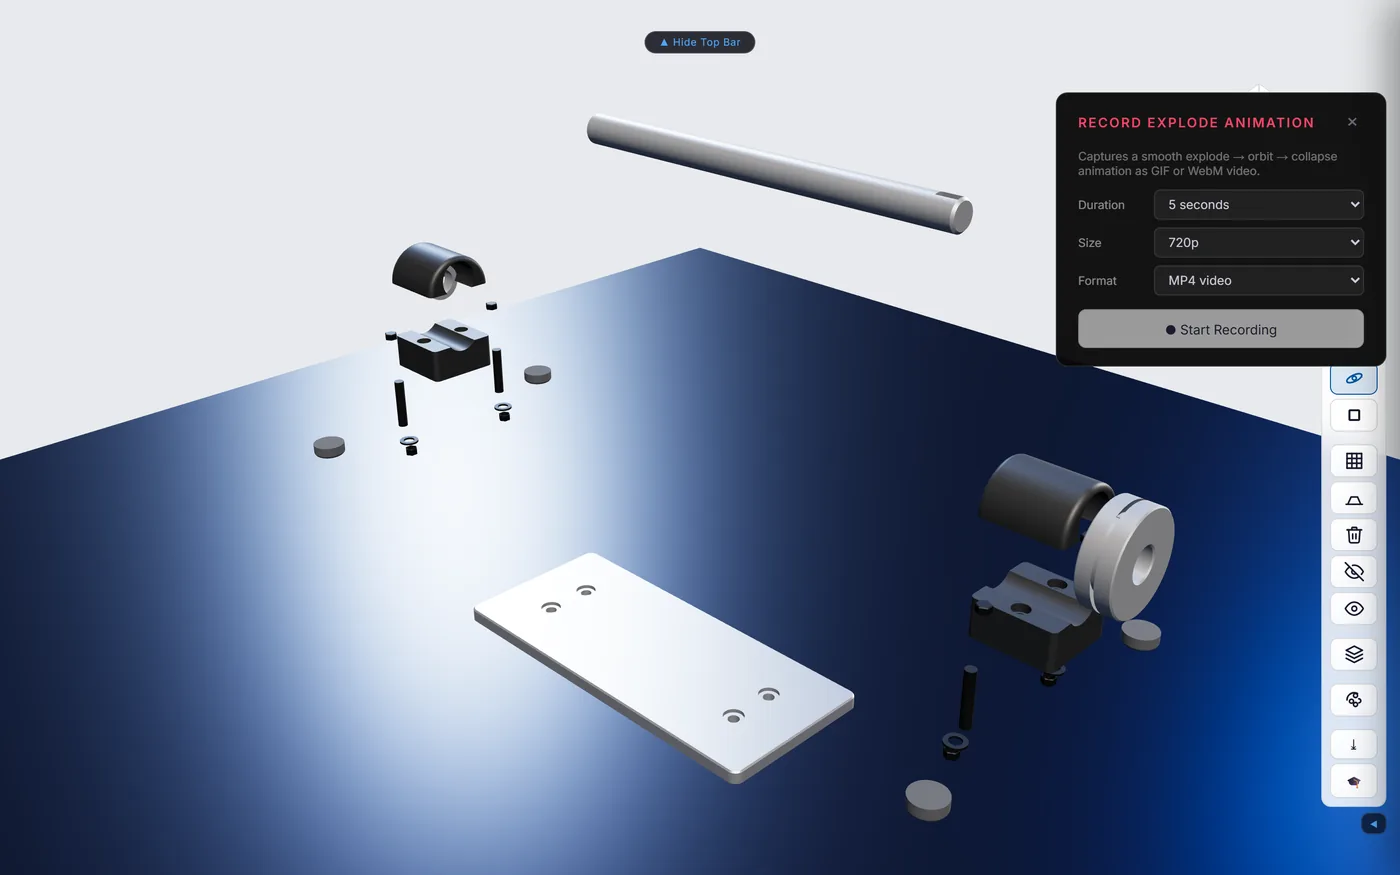
3.4 Export
3.5 AI Tools
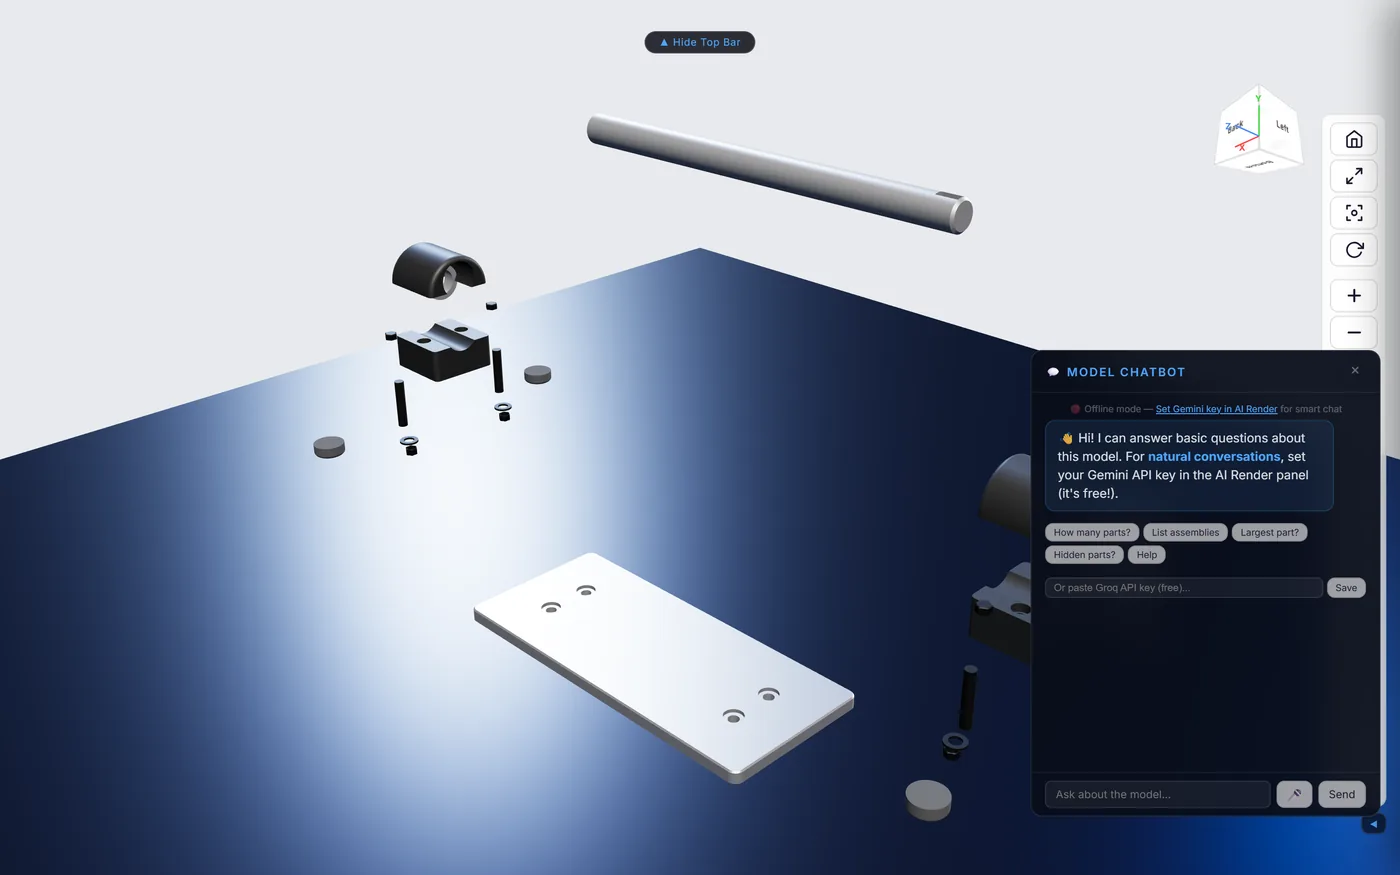
Every tool on this tab that calls out to an AI model uses your own API key, pasted once and kept in your browser — see §5 for the full setup and cost explanation.
3.6 Settings
4. Rendering & Materials
Imported STEP/IGES files carry real PBR materials from the conversion pipeline — parts don't need manual re-texturing to look right out of the box. When you want to override that (show a part in a different finish for a render, a catalog shot, or just to compare options), View → Materials applies a real PBR preset to it.
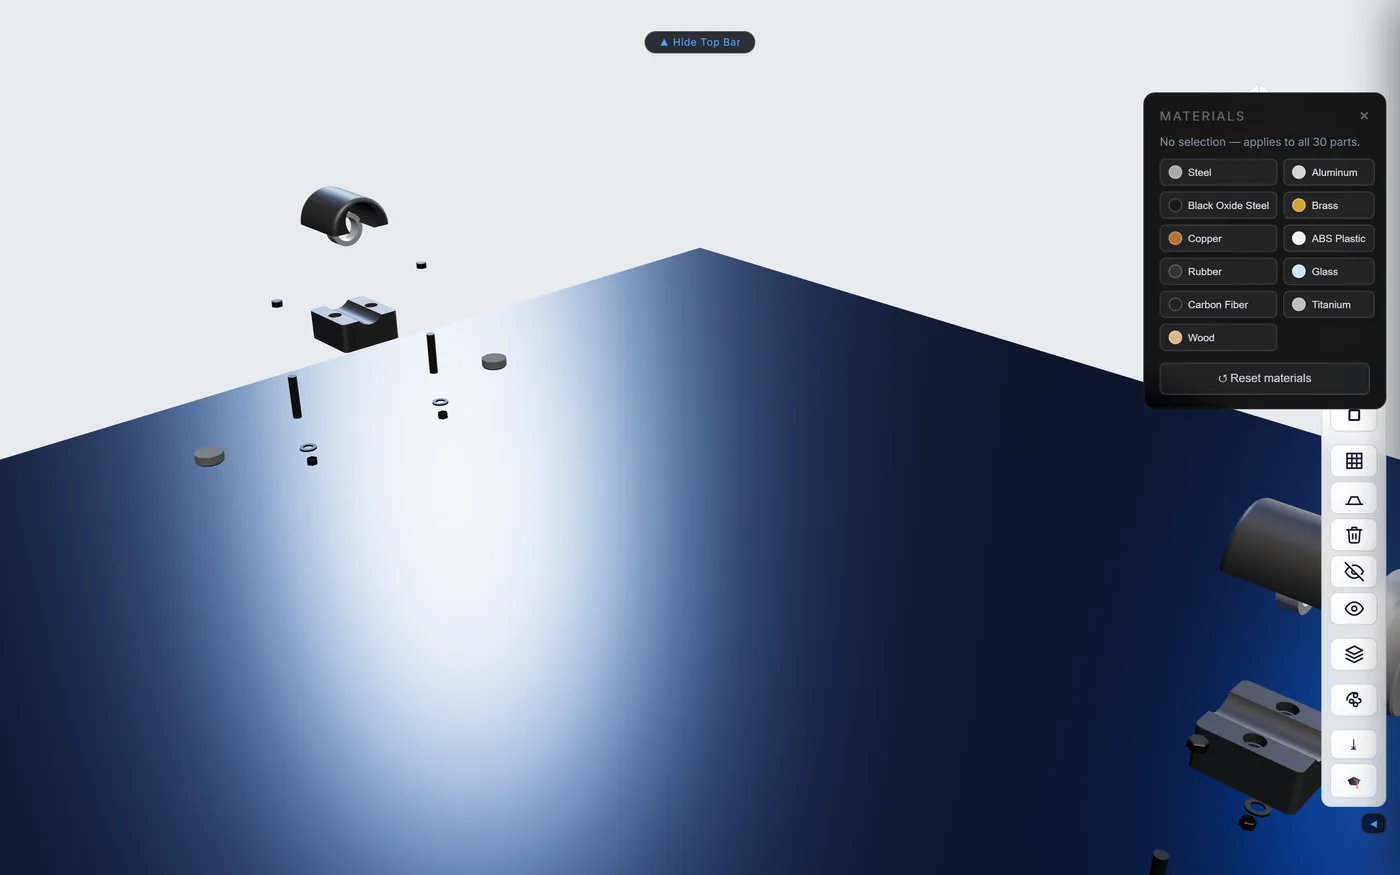
Click a part (or several — the usual selection) first, then a swatch: with a selection active, the preset applies only to those parts; with nothing selected, it applies to every visible part. Reset materials restores whatever the model shipped with. Presets: Steel, Aluminum, Black Oxide Steel, Brass, Copper, ABS Plastic, Rubber, Glass, Carbon Fiber, Titanium, Wood — each a real metalness/roughness/color combination, not a flat color swap.
Two view modes change how the whole model reads, independent of per-part materials:
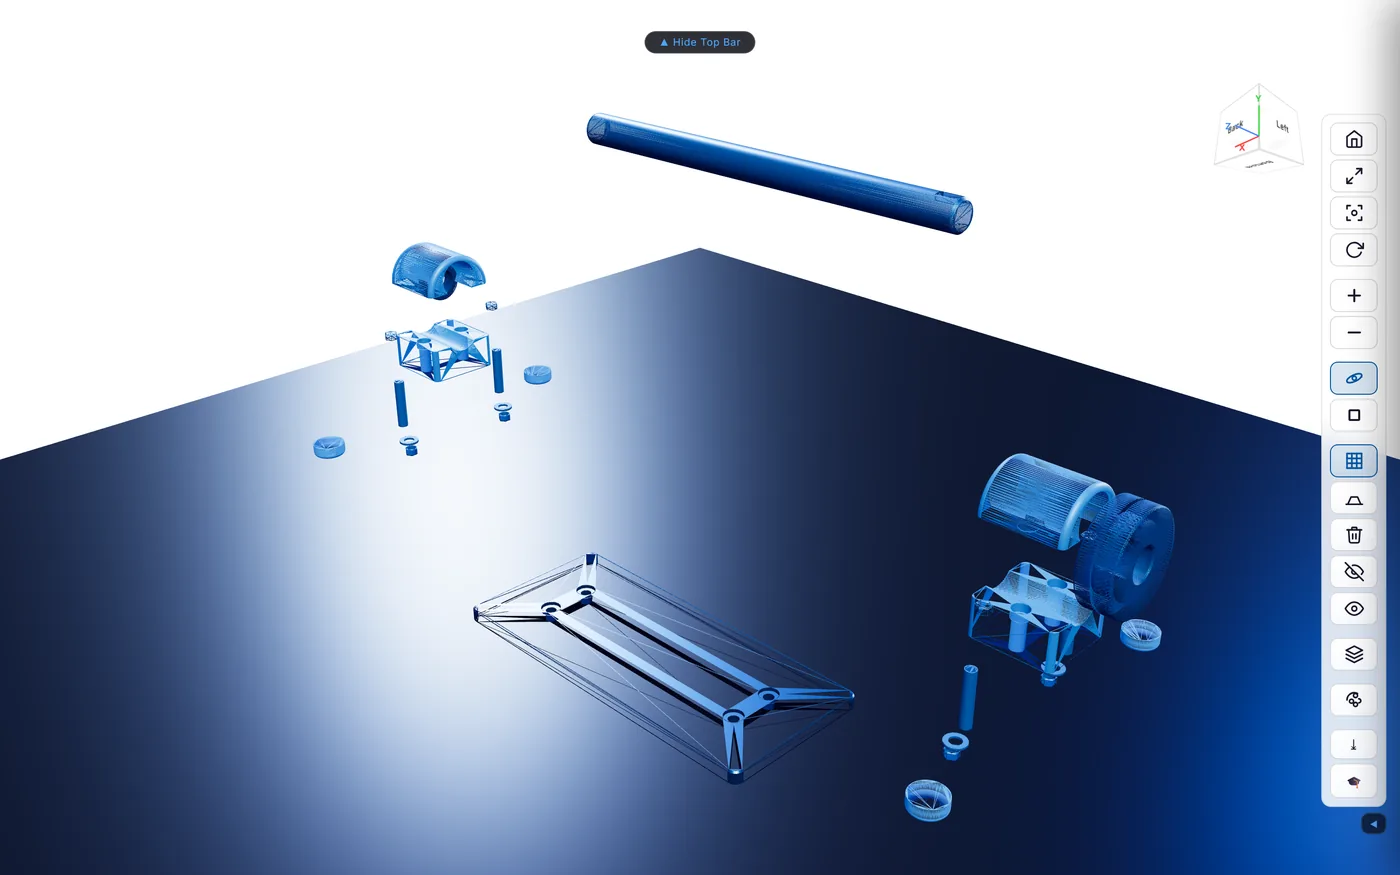
For lighting control, Settings → Configure exposes brightness, contrast, ambient light and field of view; Settings → Flat Light swaps to shadowless even lighting. View → Grid toggles the floor and its opacity slider — turning it down (or off) is the fastest way to stop a bright floor from competing with the model in a screenshot.
5. AI Tools — Bring Your Own Key
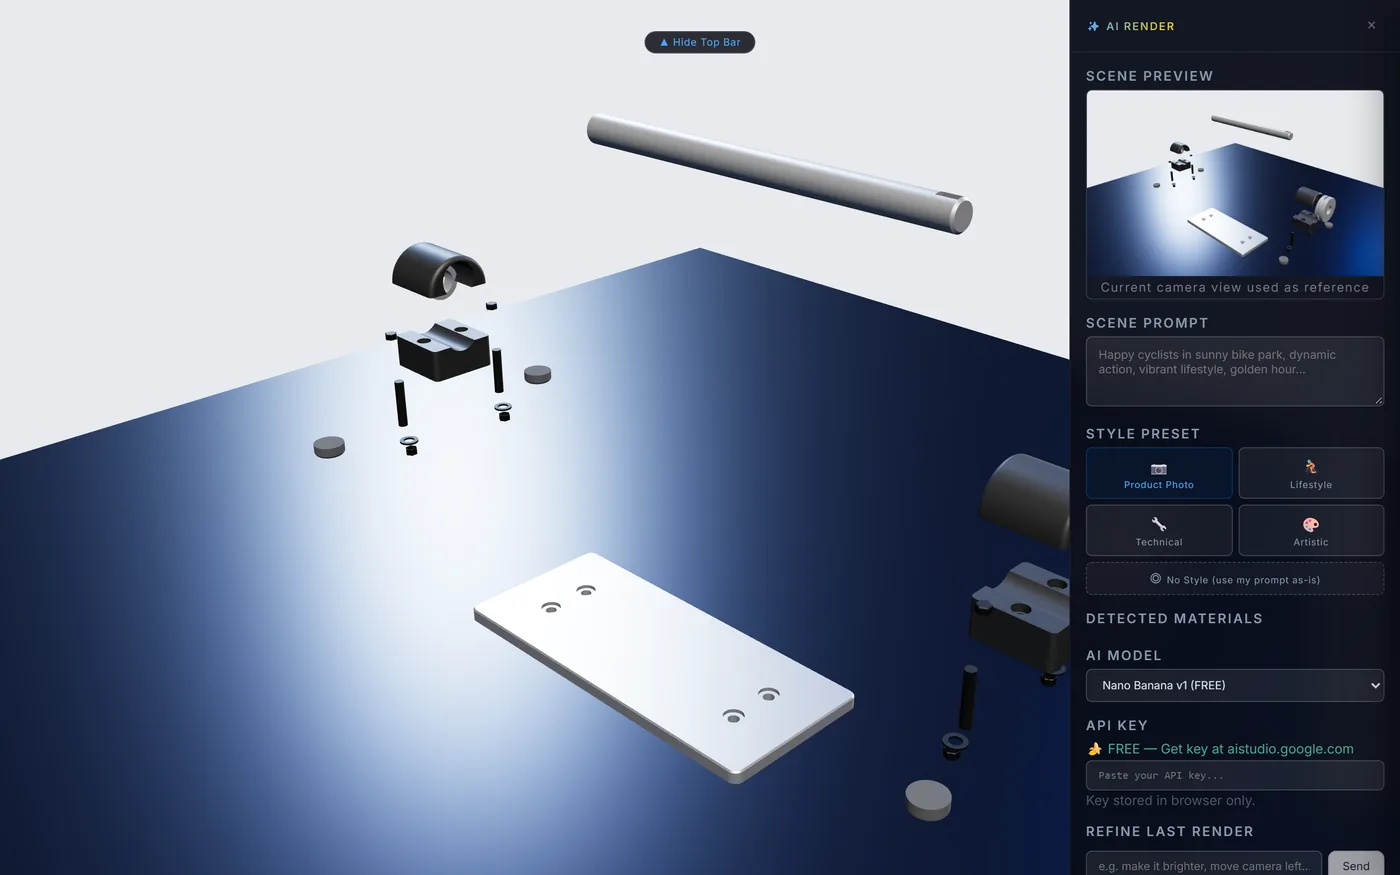
AI Render, the AI chat assistant and Part Narrator all call an AI model directly from your browser, using an API key you provide. ExplodeView never sees or bills for it.
Getting a free key
The default model is Google's Nano Banana (Gemini's image model), free to use. Click AI Tools → AI Render, then under API Key follow "FREE — Get key at aistudio.google.com" to Google AI Studio, create a key, and paste it into the field. Other providers are selectable from the same AI Model dropdown (Stability AI, OpenAI DALL·E 3, Fal.ai FLUX, Replicate) if you'd rather bring a key for one of those instead.
Where it's stored
In your browser's localStorage, under this site's origin — nothing is sent to ExplodeView's own servers. It stays on the machine and browser profile where you pasted it; open the app on another device and you'll paste it again there.
6. Exporting Your Work
Everything under the Export tab (§3.4) writes to a local file — nothing round-trips through a server.
| What | Formats |
|---|---|
| Still image | PNG (transparent or with background), JPG, WebP, print-quality TIFF — 1×, 2× or 4× resolution |
| Animation | GIF or WebM video of an explode → orbit → collapse sequence |
| Bill of Materials | On-screen table, Copy, or CSV |
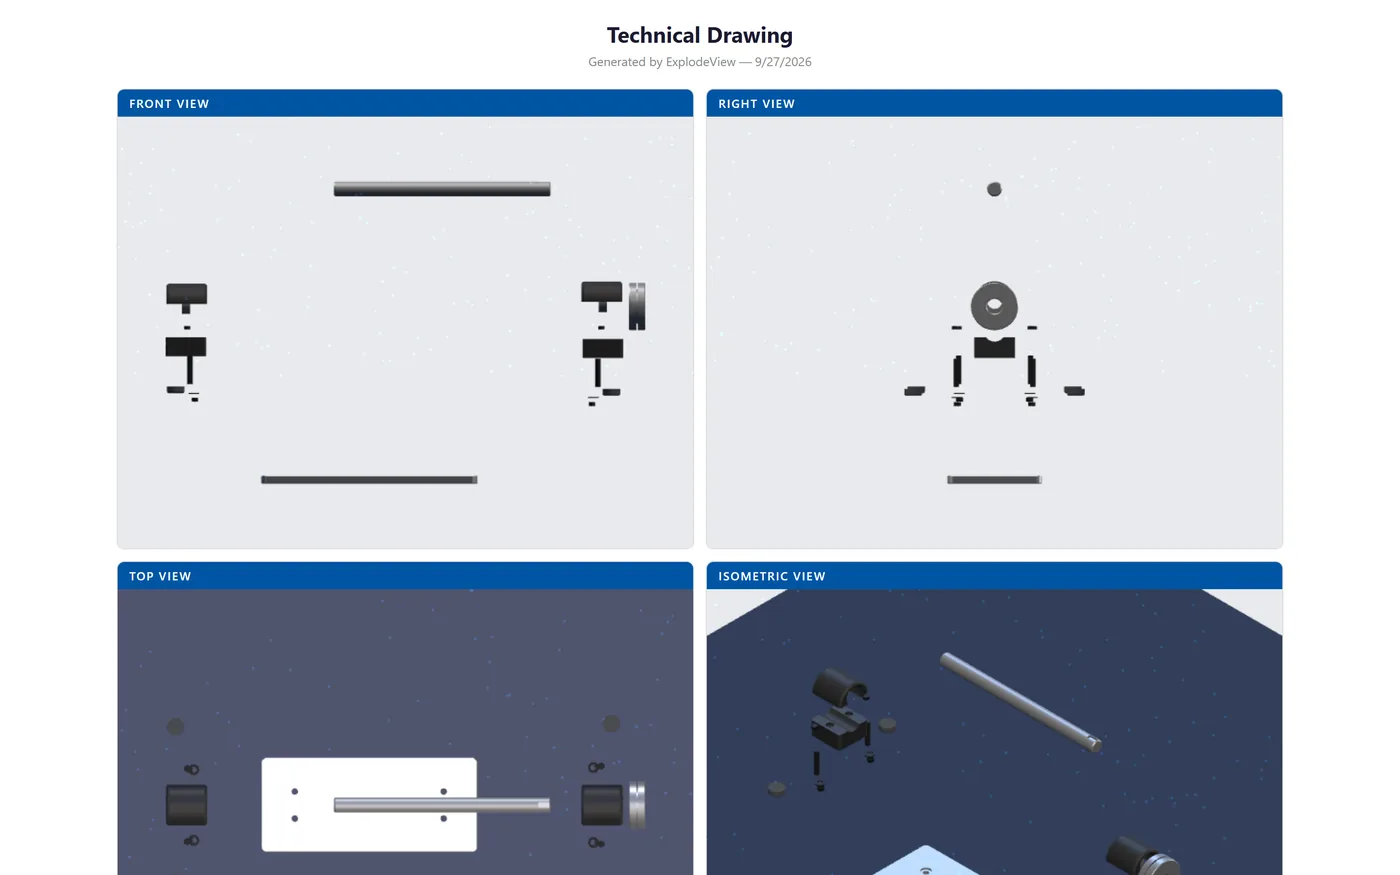
| Technical drawing | Standalone HTML with Front/Right/Top/Isometric views and a title block (A4–A0 or Letter, PNG/PDF/TIFF/DXF from the Tree panel's drawing controls) |
| Spare-parts catalog | Standalone interactive HTML page |
7. Embed & Share
Export → Share opens a panel with a live link, an embed code, and display options — no build step, no npm install.
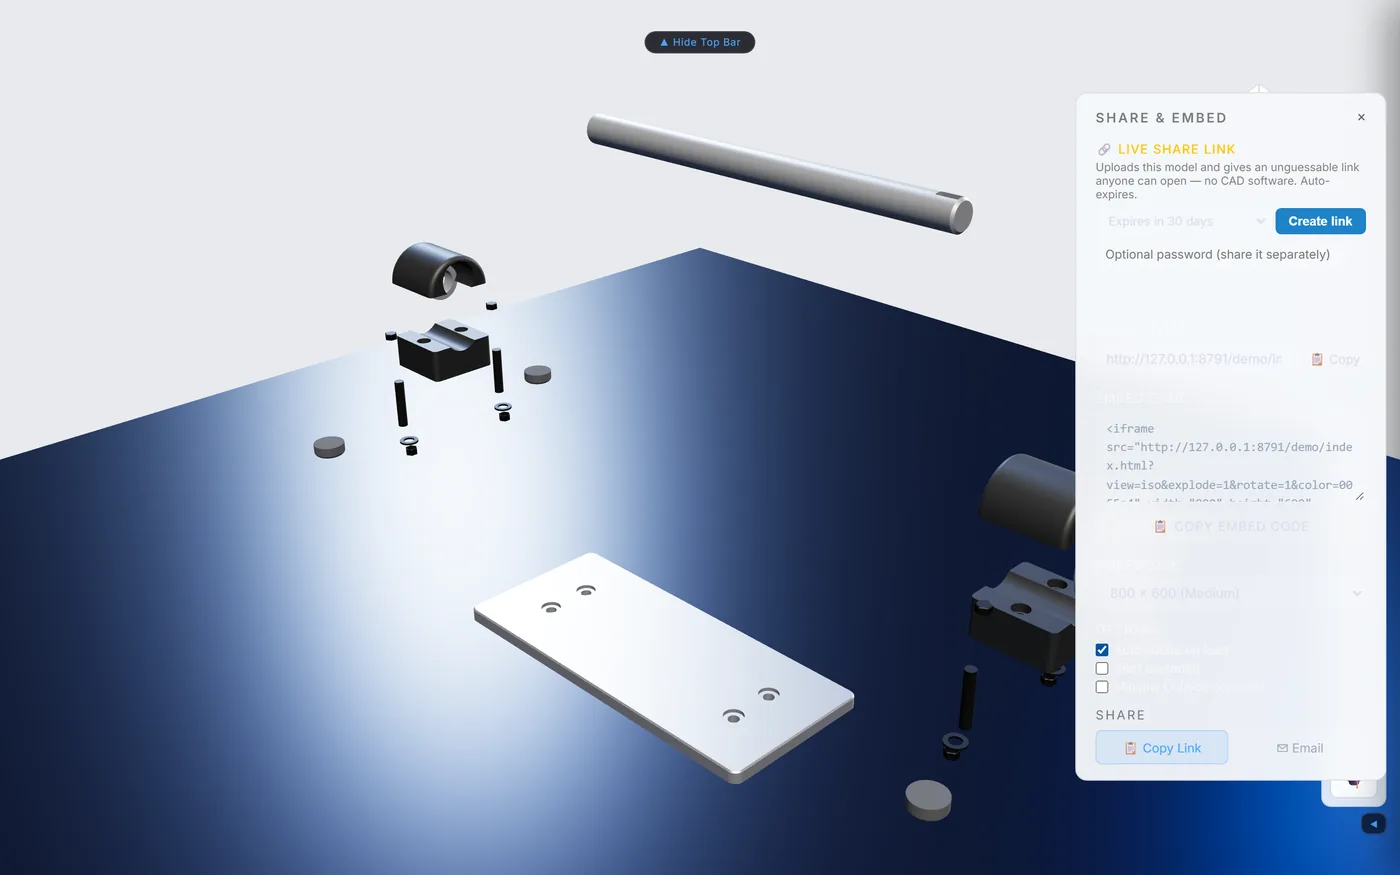
Live Share Link uploads the current model and returns an unguessable link anyone can open, no CAD software required — set an expiry (default 30 days) and, optionally, a password to share separately. The embed code looks like this:
<!-- Generated by the Share panel — paste as-is -->
<iframe src="https://explodeview.com/s/<your-model-id>"
        width="100%" height="600" frameborder="0"
        allow="xr-spatial-tracking" allowfullscreen></iframe>
Options: Auto-rotate on load, Start exploded, and Minimal UI (hides the toolbar for a clean product-page embed). Export → QR turns the same link into a scannable code for print materials or a shop floor. Shared models are capped at 20 MB.
8. Desktop App — Install
ExplodeView Pro runs standalone on Windows, macOS (Intel and Apple Silicon) and Linux — no browser, no trial timer, and the 40 MB import cap is gone. Download from the download page with your license key.
chmod +x ExplodeView-Pro-*.AppImage, then run it.Large assemblies (100 MB+) convert locally through Docker rather than in-browser WASM — install Docker Desktop once, and ExplodeView starts the explodeview-converter container for you on import.
9. Activation
First launch of the desktop app opens the activation window.
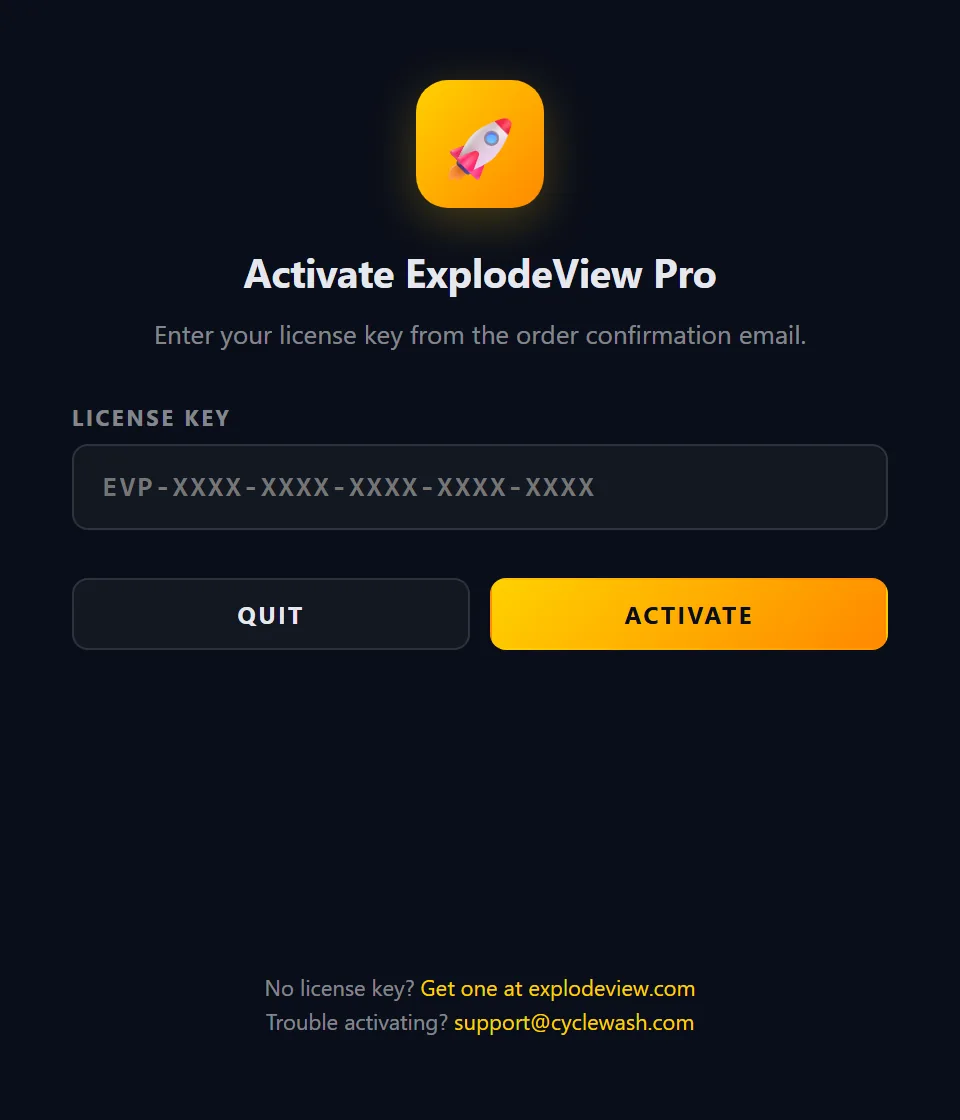
Paste the key from your order confirmation email (format EVP-XXXX-XXXX-XXXX-XXXX-XXXX — the field auto-formats as you type) and click Activate. One license key activates up to 3 machines — reinstalling on the same machine doesn't use up a slot. No key yet? The window links to explodeview.com to buy one. The same key also unlocks the full browser app — paste it into "Have a license key?" on the paywall, or Settings, from the browser.
10. Trial Rules
The 7-day trial runs entirely in the browser at explodeview.com — the desktop app has its own activation and never shows this gate.
The flow: click "Start 7-day trial" on the pricing page, pay €9.99 through Stripe Checkout, and your license key arrives by email within a minute — paste it into "Have a license key?" on the paywall screen to unlock.
(Screenshots below are from the retired free-trial flow and are pending an update to match the current paywall.)
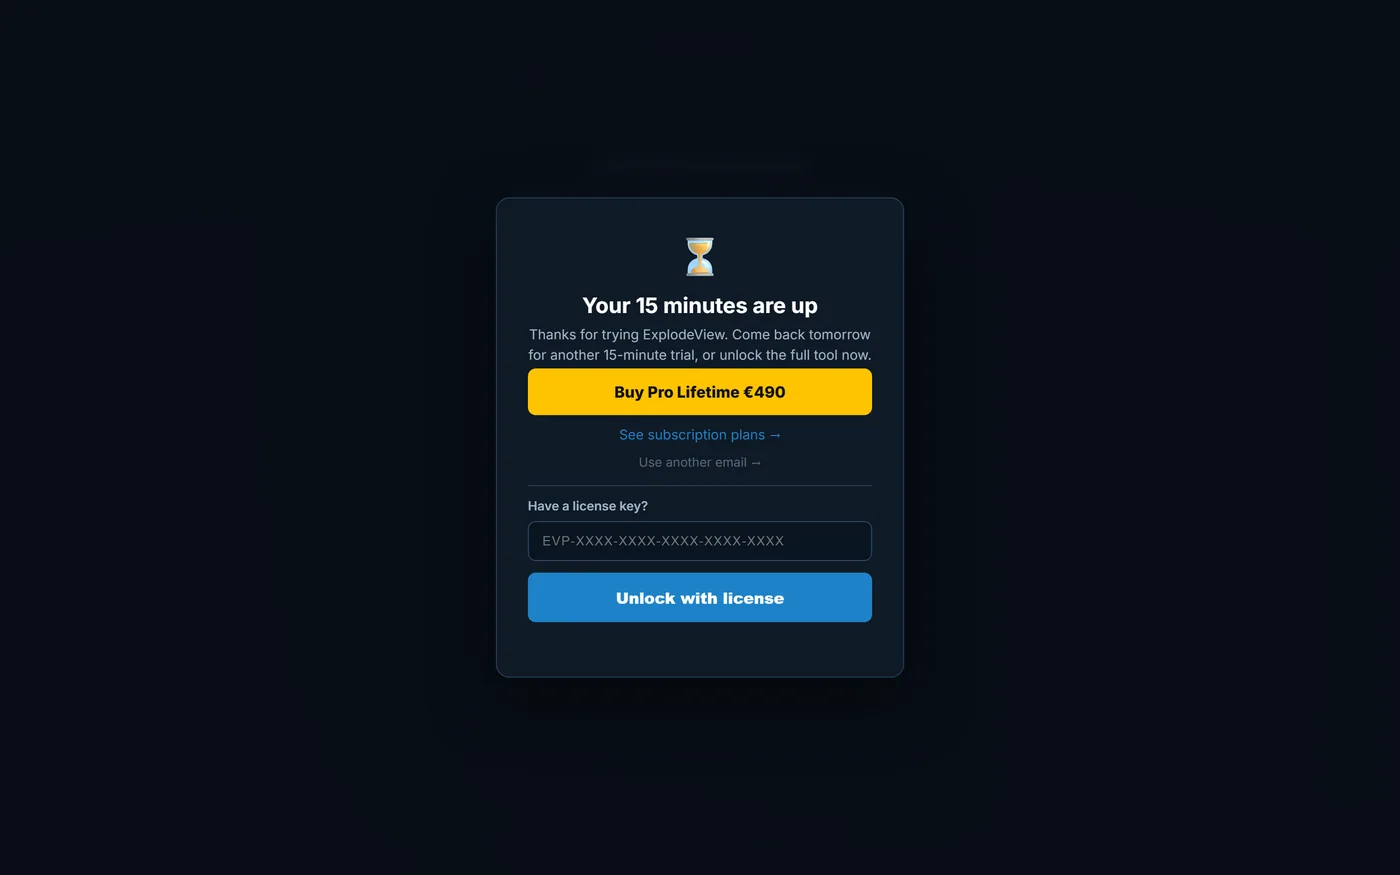
Already have a license key? Click "Have a license key? Enter it →" on the email step, or paste it on the lock screen — either unlocks the full app immediately with no timer.
11. Keyboard Shortcuts
Shortcuts are ignored while typing in a text field. Press ? in the app any time for this list.
| Key | Action |
|---|---|
| ? | Toggle the shortcuts panel |
| H | Home view |
| T | Toggle the assembly tree |
| E | Explode / collapse |
| C | Section cut |
| M | Measure |
| A | Annotate |
| R | Auto-rotate |
| G | Toggle grid |
| W | Toggle wireframe |
| F | Fullscreen |
| S | Screenshot export |
| 1–6 | Jump to sub-assembly 1–6 |
| Esc | Close all open panels |
| ⌘/Ctrl Z | Undo last part move |
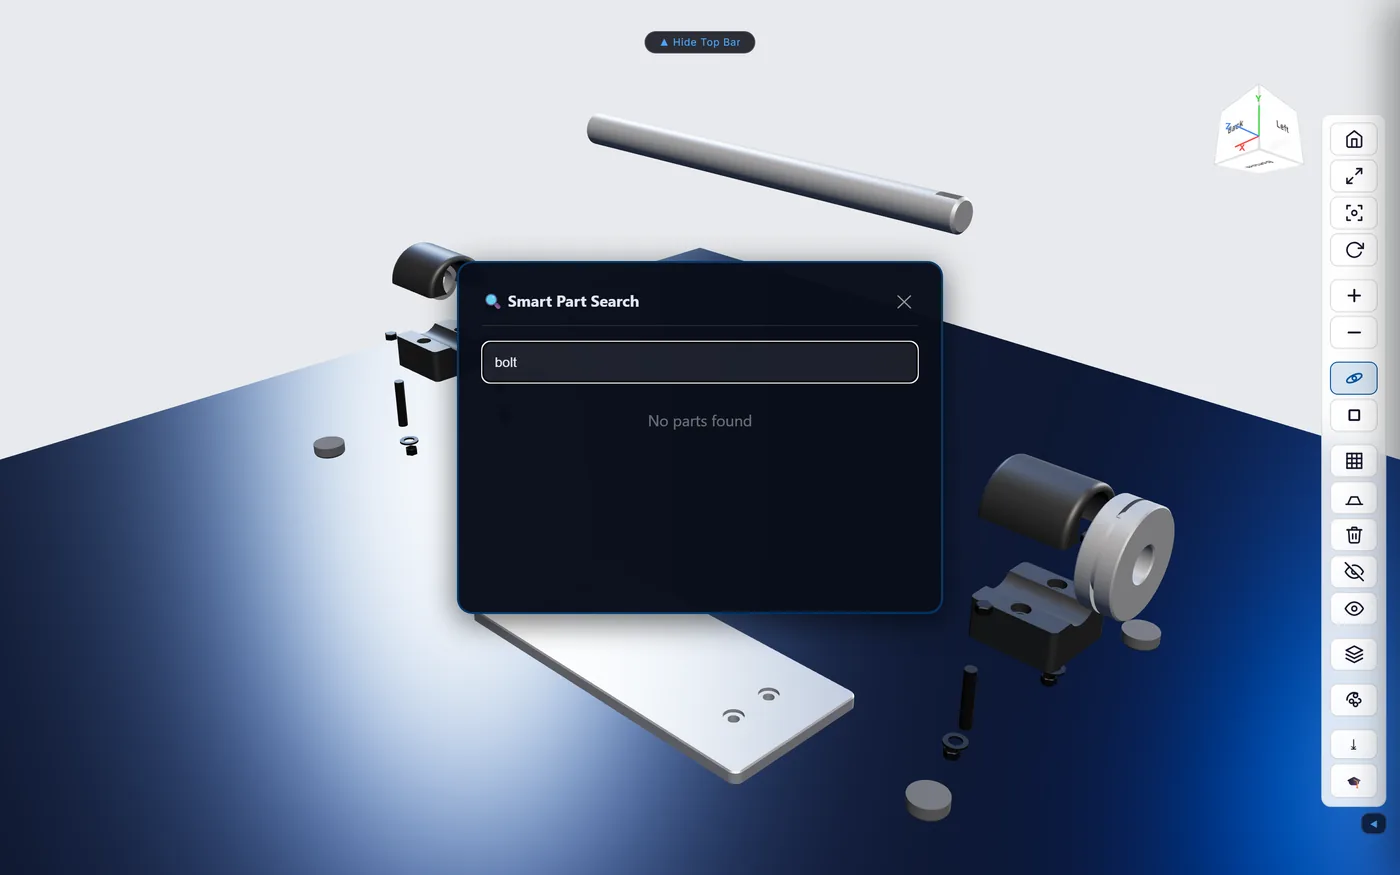
| ⌘/Ctrl G | Smart Search |
| ⌘/Ctrl N | Part Narrator (AI) |
| ⇧A | AR Mode |
| ⇧I | Assembly Instructions |
| ⇧P | Toggle annotation mode |
12. 3D Mouse (SpaceMouse)
ExplodeView supports 3Dconnexion SpaceMouse devices — including the wireless Universal Receiver — for one-handed 3D navigation: push, pull, tilt and twist the cap to pan, zoom and orbit while your other hand stays on the keyboard or mouse.
Connecting
Click 🕹️ 3D Mouse in the View tab, then Connect 3D Mouse and pick your device from the browser's picker. The connection is remembered — on your next visit the app reconnects automatically, no re-pairing needed.
| Environment | Support |
|---|---|
| Chrome / Edge (desktop) | ✓ Full support (WebHID) |
| ExplodeView Pro desktop app (Electron) | ✓ Full support |
| Firefox / Safari | Not available — the 🕹️ 3D Mouse panel explains this and points you to Chrome/Edge or the desktop app |
Default Mapping (Object Mode)
Out of the box the model behaves as if it were physically attached to the cap:
| Motion | Effect |
|---|---|
| Pull the cap toward you | Zoom in (camera moves closer) |
| Push the cap away | Zoom out |
| Slide the cap left/right/up/down | Pan — the model follows the cap |
| Twist the cap | Orbit (spin) around the model |
| Tilt the cap | Orbit (tip) toward/away from you |
| Left button | Home / Fit (same as the 🏠 Home button) |
| Right button | Toggle Explode (same as the Explode control) |
Settings Panel
Every direction above is independently invertible from the panel — if a particular axis feels backwards on your hardware, flip its checkbox rather than fighting it.
13. FAQ
Do I need to install anything to try ExplodeView?
No — the 7-day browser trial (€9.99) runs at explodeview.com with nothing to install. Only the standalone Pro app (§8) requires a download, and that's optional.
My file is bigger than 40 MB — what do I do?
The browser tier can't safely convert it (§2). Use the desktop app, which converts locally via Docker with no size cap in practice.
Does the AI Render feature cost anything?
Not from ExplodeView — but the AI provider you connect (Gemini/Nano Banana by default, free at time of writing) bills your own account per their pricing once you're past any free tier. See §5.
Is my API key sent to ExplodeView's servers?
No. It's stored in your browser's localStorage and used only for direct calls from your browser to the AI provider you chose.
Can I use the trial more than once?
Once per email address per 24 hours. A different email starts a fresh trial; a license key removes the limit entirely.
How many computers can I activate with one license?
Three. Reinstalling on a machine you've already activated doesn't use another slot.
Do trial exports carry a watermark?
No. The 7-day trial (€9.99, card required) has full Pro access from the first minute, with clean exports. Cancel before the trial ends to avoid the €49.99 monthly charge.
14. Support
Lost a license key, a bug to report, or a question this manual didn't answer: support@cyclewash.com. For step-by-step walkthroughs, see the Tutorials page.